Unreal UMG : Image in RichTextBlock
RichTextBlock안에 이미지 넣기
- 출처 : RichTextBlock안에 이미지 넣기
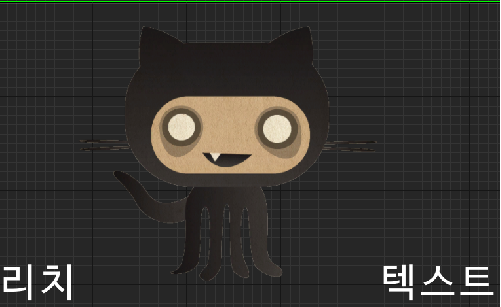
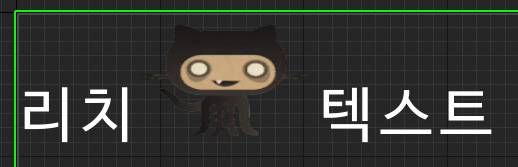
위 가이드라인대로 하면 문제점이 하나 있다.
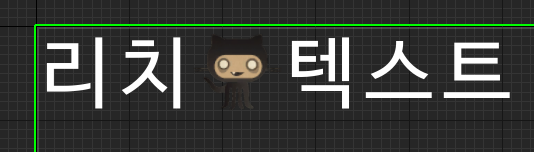
위와같이 이미지가 텍스트와 동일한 크기가 되는 문제가 있다.
const TSharedRef<FSlateFontMeasure> FontMeasure = FSlateApplication::Get().GetRenderer()->GetFontMeasureService();
float IconHeight = FMath::Min((float)FontMeasure->GetMaxCharacterHeight(TextStyle.Font, 1.0f), Brush->ImageSize.Y);
float IconWidth = IconHeight;
엔진코드 RichTextBlockImageDecorator.cpp에 보면 위와같이 Height값을 Font사이즈이상 설정할 수가 없다.
따라서 SRichInlineImage를 재정의 해줘서 너비&높이를 사용자가 직접 컨트롤할 수 있도록 하여야 한다.
첫번째 해결법
1번 RichTextBlockImageDecorator 재정의
TestRichTextBlockImageDecorator.h
UCLASS()
class PROJECT_API UTestRichTextBlockImageDecorator : public URichTextBlockImageDecorator
{
	GENERATED_BODY()

public:
	virtual TSharedPtr<ITextDecorator> CreateDecorator(URichTextBlock* InOwner) override;

public:
	UPROPERTY(EditAnywhere, BlueprintReadWrite, Category=Appearance)
	int Width;
	UPROPERTY(EditAnywhere, BlueprintReadWrite, Category=Appearance)
	int Height;
};
TestRichTextBlockImageDecorator.cpp
class STestRichInlineImage : public SCompoundWidget
{
public:
	SLATE_BEGIN_ARGS(STestRichInlineImage)
	{}
	SLATE_END_ARGS()

public:
	void Construct(const FArguments& InArgs, const FSlateBrush* Brush, const FTextBlockStyle& TextStyle, TOptional<int32> Width, TOptional<int32> Height, EStretch::Type Stretch)
	{
		if (ensure(Brush))
		{
			int32 IconWidth = 0, IconHeight = 0;
			if (Width.IsSet())
			{
				IconWidth = Width.GetValue();
			}

			if (Height.IsSet())
			{
				IconHeight = Height.GetValue();
			}

			ChildSlot
			[
				SNew(SBox)
				.HeightOverride(IconHeight)
				.WidthOverride(IconWidth)
				[
					SNew(SScaleBox)
					.Stretch(Stretch)
					.StretchDirection(EStretchDirection::DownOnly)
					.VAlign(VAlign_Center)
					[
						SNew(SImage)
						.Image(Brush)
					]
				]
			];
		}
	}
};

class FTestRichInlineImage : public FRichTextDecorator
{
public:
	FTestRichInlineImage(URichTextBlock* InOwner, UTestRichTextBlockImageDecorator* InDecorator, const int& InWidth, const int& InHeight)
		: FRichTextDecorator(InOwner)
		, Decorator(InDecorator), Width(InWidth), Height(InHeight)
	{
	}

	virtual bool Supports(const FTextRunParseResults& RunParseResult, const FString& Text) const override
	{
		if (RunParseResult.Name == TEXT("img") && RunParseResult.MetaData.Contains(TEXT("id")))
		{
			const FTextRange& IdRange = RunParseResult.MetaData[TEXT("id")];
			const FString TagId = Text.Mid(IdRange.BeginIndex, IdRange.EndIndex - IdRange.BeginIndex);

			const bool bWarnIfMissing = false;
			return Decorator->FindImageBrush(*TagId, bWarnIfMissing) != nullptr;
		}

		return false;
	}

protected:
	virtual TSharedPtr<SWidget> CreateDecoratorWidget(const FTextRunInfo& RunInfo, const FTextBlockStyle& TextStyle) const override
	{
		const bool bWarnIfMissing = true;
		const FSlateBrush* Brush = Decorator->FindImageBrush(*RunInfo.MetaData[TEXT("id")], bWarnIfMissing);

		return SNew(STestRichInlineImage, Brush, TextStyle, Width, Height, EStretch::Fill);
	}

private:
	UTestRichTextBlockImageDecorator* Decorator;
	int Width;
	int Height;
};

TSharedPtr<ITextDecorator> UTestRichTextBlockImageDecorator::CreateDecorator(URichTextBlock* InOwner)
{
	return MakeShareable(new FTestRichInlineImage(InOwner, this, Width, Height));
}
결과
ImageDecorator를 TestRichTextBlockImageDecorator로 블루프린트를 만든 뒤
위와 같이 width&height값을 설정하면
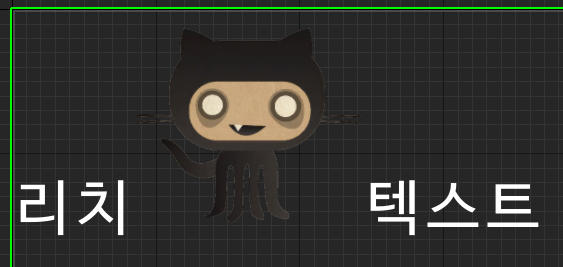
이제 사용자 마음대로 이미지 너비&높이를 설정할 수 있다.
두번째 해결법
Text내의 태그값으로 이미지 사이즈 조절
virtual TSharedPtr<SWidget> CreateDecoratorWidget(const FTextRunInfo& RunInfo, const FTextBlockStyle& TextStyle) const override
{
	const bool bWarnIfMissing = true;
	const FSlateBrush* Brush = Decorator->FindImageBrush(*RunInfo.MetaData[TEXT("id")], bWarnIfMissing);

	TOptional<int32> OptionalWidth;
	if (const FString* WidthString = RunInfo.MetaData.Find(TEXT("width")))
	{
		int32 WidthTemp;
		OptionalWidth = FDefaultValueHelper::ParseInt(*WidthString, WidthTemp) ? WidthTemp : TOptional<int32>();
	}

	TOptional<int32> OptionalHeight;
	if (const FString* HeightString = RunInfo.MetaData.Find(TEXT("height")))
	{
		int32 HeightTemp;
		OptionalHeight = FDefaultValueHelper::ParseInt(*HeightString, HeightTemp) ? HeightTemp : TOptional<int32>();
	}

	return SNew(STestRichInlineImage,
		Brush,
		TextStyle,
		OptionalWidth.IsSet() ? OptionalWidth : Width,
		OptionalHeight.IsSet() ? OptionalHeight : Height,
		EStretch::Fill);
}
첫번째 해결법에서 정의한 TestRichTextBlockImageDecorator.cpp내 CreateDecoratorWidget함수만 수정하여 태그에서 width & height를 받아오도록 수정
결과

텍스트내에 width & height 태그를 추가 입력하면
이미지 사이즈가 태그에서 정의한대로 된다.
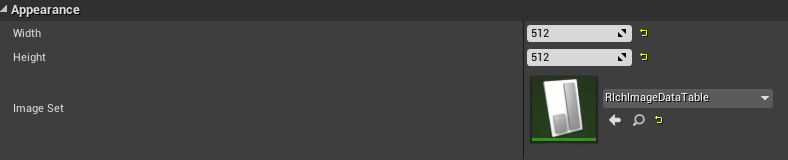
세번째 해결법
데이터 테이블의 ImageSize를 활용
class STestRichInlineImage : public SCompoundWidget
{
public:
	SLATE_BEGIN_ARGS(STestRichInlineImage)
	{}
	SLATE_END_ARGS()

public:
	void Construct(const FArguments& InArgs, const FSlateBrush* Brush, const FTextBlockStyle& TextStyle, TOptional<int32> Width, TOptional<int32> Height, EStretch::Type Stretch)
	{
		if (ensure(Brush))
		{
			ChildSlot
			[
				SNew(SBox)
				.HeightOverride(Brush->GetImageSize().Y)
				.WidthOverride(Brush->GetImageSize().X)
				[
					SNew(SScaleBox)
					.Stretch(Stretch)
					.StretchDirection(EStretchDirection::DownOnly)
					.VAlign(VAlign_Center)
					[
						SNew(SImage)
						.Image(Brush)
					]
				]
			];
		}
	}
};
첫번째 해결법에서 정의한 TestRichTextBlockImageDecorator.cpp내 STestRichInlineImage클래스만 수정하여 HeightOverride & WidthOverride를 Brush의 ImageSize로 설정한다.
결과

데이터테이블에서 ImageSize를 1024x1024로 변경하면